Tag: Made It

  • Side Yard Project

    When we bought our house a few years ago, there was a big shed in the side yard.  It might’ve been useful, but it was placed right in front of a sliding door and was visible from our living room.  We have lots of projects to do, but my wife wanted to work on the yard and this is were it started.

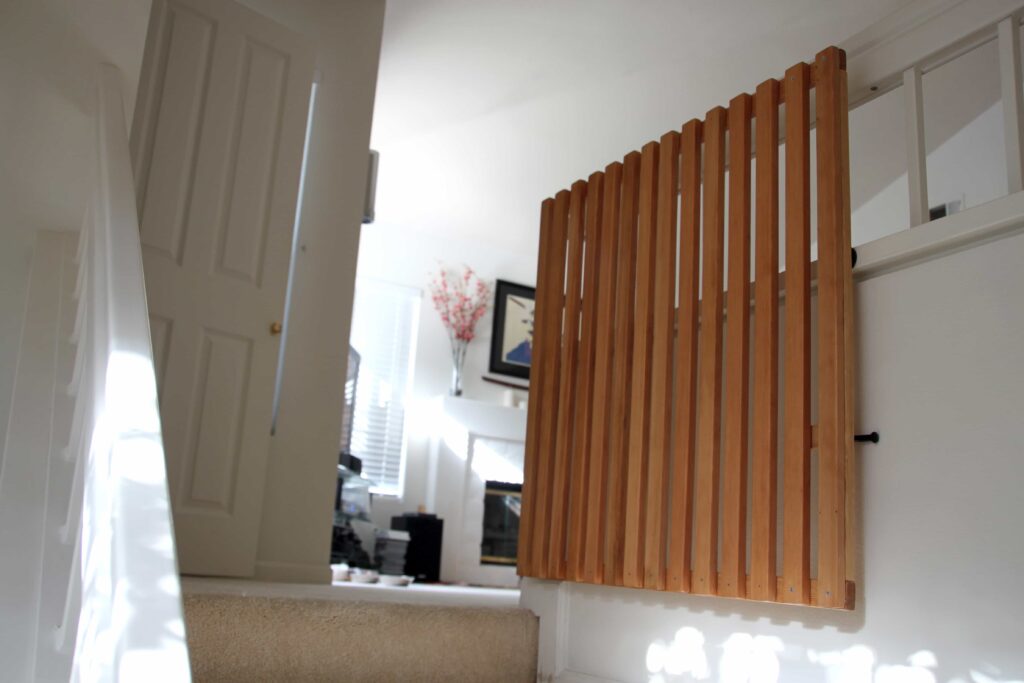
    I started working on the yard about a year ago and I took down the shed and moved it to my in-law’s farm, which was a quite an ordeal.  I actually worked on the front yard next, but ended up making a decorative fence, planted a Japanese maple tree and filled it with some rocks.

    I also tore out our old irrigation system, put in a new one along with some low-voltage lighting.  I’ve never done any of those things so there was a lot to learn, but it’s all worked out pretty well so far.

    side yard

    side yard night

    The wood is called Ipe and I bought a bunch of it from Advantage Lumber to make this fence and another one in the front yard.  I had the idea of buying 12′ boards instead of the standard 8′ boards for this fence so I wouldn’t see a seam.  But I discovered that the 12′ boards have a lot more curves and warping.  It was a lot harder to work with and I don’t think I would’ve made the same choice if I was making it again.

    The rocks are 1/2″ – 1″ black Mexican beach pebbles.  I spent a lot of time at the specialty builder supply store looking at rocks until I found these.

  • French Drain

    When we worked on our yard, my wife wanted to make a French drain on the side of the house.  I didn’t know what that was, but I researched it and learned that it was a lot of work.  It doesn’t rain very often in southern California and we’ve been in a major drought on top of that.  But I still made and it works incredibly well.

    I dug out a trench that runs from our back yard to the street.  Then I lined it with some landscaping fabric like a taco.  I put down a thin layer of gravel and then some 4″ PVC pipe with holes.  I thought the holes would point up, but they are supposed to point down.  Then I covered it with the rocks and wrapped it up with the cloth and lightly covered it with dirt.img_2794

    The idea is that water travels in the path of least resistance.  So it’ll soak through the dirt but find it’s way to the rocks.  The cloth prevents dirt from getting into the rocks and the holes in the PVC, so the trench will fill with water.  The holes on the bottom let the water enter the pipe and it gets carried down until it exits at the street.

    img_2796

    I also added pipes that connect the rain chain to the drain.  Since our gutters run the length of our house, even a light rain makes a huge down pour at the chain.

    img_2790

    This was not the most fun project I worked on, but it was probably one of the more important ones dues to the hill in the back and our zero-lot-line house.

  • A Bigger Shelf

    My oldest son loves garbage trucks and also started branching out to construction vehicles and fire trucks.  I bought him the orange Bruder garbage truck when we moved as a gift for being so good during the transition.  He played with it for years and still does from time to time.

    He ended up getting a bunch more from mom, grandma and his aunties and uncles.  They’re so big so I had to make a shelf just for his trucks!

    Truck Shelf

  • Mid-Century Inspiration

    I had some time off over the holidays and managed to finish a media console I’ve been working on. I’m not sure how I feel about this one. On one hand, it’s probably the nicest thing I’ve made but on the other hand, I see all the stupid mistakes I made along the way. I was able to hide a lot of them and it works well in our space so it ended up ok.

    I used a walnut plywood that I got from Austin Hardwood in Santa Ana. I really wanted to do bevel cuts for the edges, but I don’t have a table saw or a router so I ended up buying a Makita track saw. It works great and makes super clean cuts so long as everything’s clamped down properly (stupid mistake #1).

    Since it’s plywood, I covered the edges with veneer edge banding. It was my first time using it, but it’s really easy to do and it’s actually kind of fun.

    I wanted a dark walnut color and I tested out a bunch of stains and oils and ended up using Watco Danish Oil (Dark Walnut). I liked how it brought out the grain and it’s really easy to apply. Although, it wasn’t quite dark enough so I added a light coat of Old Master’s Black Walnut gel stain and finished it with 4 coats of General Finishes Arm-R-Seal satin.

    I sized it to go along with a free TV we got from the neighbors and to also fit a vintage receiver. This also became an interest of mine, so I picked up a vintage Yamaha CR-420 receiver. I honestly chose it mostly because of the aesthetics, but it sounds really clean for a lower powered, compact unit. I paired it with Micca MB42x speakers and I’m really impressed with these too. I feel like buying some more to replace a 5.1 setup in the living room, but we hardly watch anything that’s not on Disney Jr and if we do, it’s usually with it on mute with the subtitles on!

    Media Console Media Console Media Console Yamaha CR-420

  • Upcycled Willys

    One of our neighbors recently threw out an old Power Wheels Jeep. It was really dirty and it didn’t work, but I took a chance on a new battery and it worked.

    Power Wheels

    It needed lots of cleaning and I wanted to give it a new look so I took it all apart.

    Power Wheels Disassembled

    My wife and I had the same idea to make it into an old military Jeep known as the Willys Jeep.  I painted it in Olive Drab an bought the Army star stickers.  I kept some of the original stickers but I also made some Willys Jeep gauges and a data plate for the dash.

    Power Wheels Willys Power Wheels Willys

    I haven’t given it to my son yet, but I think he’s going to have as much fun as I did!

  • Vintage Speaker Dock

    In between painting, installing baseboards and replacing all of our 30 year old electrical outlets and switches, I worked on something more fun. My wife seems to listen to music on her iPhone so I thought I’d make something better for her.

    We also like mid-century design so I found some old speakers at Goodwill and made them into an iPhone speaker dock.

    Speaker Dock

    Speaker Dock

    I used a $20 Lepai amp and got some vintage Realistic Minimus speakers.

    I later picked up some Bose tulip speaker stands, but they are a little too big. I might have to take the stands back if I ever get around to refinishing my KLH 17s.

    It came out pretty well and sounds great, but I took some more terrible pictures and didn’t fix the cords…

    Speaker Dock

  • Teak Bench

    I found this teak bench at TJ Maxx.  It wasn’t the greatest but the price was right and I thought I could make it a little better.  This is probably grade-C teak so I didn’t feel bad if I completely messed it up.

    Teak Bench unfinished

    From my previous TJ Maxx purchase, I thought I could even out the sapwood with  a combination of dye and stain.  The hardest part about refinishing a piece is that I don’t have scrap wood to test with.  I ended up dying the underneath pieces a few times and sanding it off until I was reasonably happy with the results.

    Teak Bench

    It’s definitely not the greatest thing I’ve done, but it’s not the worst either.

  • Garage Space

    When we first moved into our house, I had a huge list of projects to work on but nowhere to do it.  So I claimed this corner of the garage and made it my own.

    This is when I gave in an bought a Makita 10″ mitre saw and started my cordless Makita collection.  I always have a hard time buying tools because I’m worried I won’t use them, but I’ve ended up making really good use of all of these tools and they’re a joy to use.

    My first project was to make this workbench so I had a place to work on the next project.  I tried using the plans found in the Family Handyman Magazine, which is great by the way.  It was the only magazine I subscribed to, but I let it expire because of how many renewal notifications they send.  But anyhow, I had to cut it down half a foot because it was designed for giants, or at least people a lot taller than me.

    Garage Space


    This is what the wall looked like before I painted.  It was actually a lot worse before this because there were holes all over the place that I patched up.

    Garage Wall

    Being a dedicated USC alumnus, I had to use the official color for the wall.  Any Trojan knows this is cardinal (not just red) and gold.  Glidden made some officially licensed paints for a lot of schools and professional teams.  However, I know USC retains its own licensing and isn’t part of a lot of these deals, so I had to give in and go with the same but otherwise official colors of Stanford and LSU…

    Garage Wall USC

    I’m also not a very good painter so I used a Fathead for the Trojan logo.  But, I did learn a good technique for painting clean lines with tape from watching the Property Brothers on HGTV.  The tip was to paint the background color again around the tape line first.  This way, there will be some bleeding that you usually get, but it’s the same color as the background.  When it dries, you paint inside the lines like normal and you get a really sharp line.

  • Mini Picnic Bench

    When we first bought our house, I wanted to make a small picnic bench for my son.  I bought a Makita 10″ dual slide compound mitre saw that’s been amazing.  Unfortunately, in my haste, I bought birch wood from Home Depot and it was a nightmare to finish (more on this later).

    I followed plans from Ana White and tried out a Kreg Jig for pocket holes for the first time.  The plans were easy to follow and the jig was really easy to use.  I put it together without any issues and it looked pretty good unfinished.

    Picnic Bench Unfinished

    As for the finishing, I tried brushing amber shellac at first, but it was a disaster. I applied too much and it dripped and dried with marks all over it, and it also came out really yellow on birch. It took me months to sand it down and research staining online.  I couldn’t tell you why I didn’t buy a sander at this point, but I’m guessing it was a form of self punishment!

    For my next attempt, I started with a red mahogany Transtint dye. Birch gets really blotchy and this seemed to help hide that and it also gave it a reddish tint. I then applied Old Masters cedar gel stain. The combination of the two seemed to provide more depth than the gel stain alone. I then added a topcoat of clear shellac in light coats with a rag and it turned out much better.

    Picnic Bench

    It would’ve came out better if I used this schedule from the start, but it was an all around learning project. Mostly I learned, never to buy birch for staining.  But my kids approve and have gotten good use of it, so that’s all that matters.

  • Dog/Baby Gate

    When we learned we we’re expecting, I already started worrying about safety.  Our condo had stairs that lead to the living room, so I made this gate.  I told everyone it was for our dog, but it was really for our son.

    gate-finished-5

    It’s made from Douglas Fir.  It’s known as a cheap wood that’s hard to work with, but I think it looks really nice.  I like that straight grain and I picked knot free boards.

    wood sanded

    I sanded them smooth to avoid splinters and rounded every corner being an over-protective, soon-to-be parent.wood stained

    I forgot what stain this is, but I want to say it was called Golden Pecan.  My memory is terrible though, so that could be completely wrong.

    We moved on from the condo and bought our house when our son was 3.  He was working on the next milestone, so I cut up the old gate and made two of these potty step stools for him.  I also saw this on Ana-White.com.

    img_1364